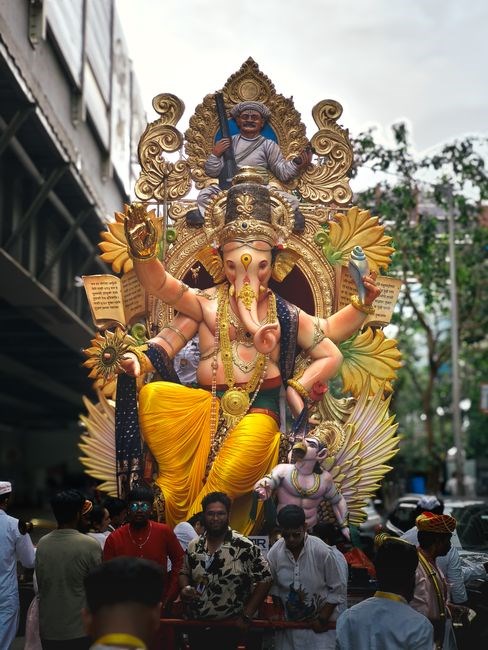
Overview of Sankashti Chaturthi 2023
In 2023, Sankashti Chaturthi fell on April 22, 2023, a day when devotees observe a fast from sunrise to moonrise, offering prayers to Lord Ganesha to dispel obstacles. The observance aligns with the lunar cycle, marking the 4th day of the waxing moon in the month of Chaitra. Devotees chant Vighnaharta mantra
Historical Significance and Mythology
According to Puranic lore, Sankashti Chaturthi marks the day when sage Kashyapa’s son, Vishnu, performed a great penance to appease the devas, who were agitated by Hanuman’s mischief. In the Mahabharata, king Yudhishthira, after a long pilgrimage, was granted a boon that he would be protected from obstacles if he observed a strict fast on the fourth lunar day. The name “Sankashti” literally means “removal of obstacles,” and the fast is believed to invoke Lord Ganesha’s blessings to clear any impediment. The myth also tells of sage Bhrigu seeking Ganesha’s guidance; Ganesha instructed him to observe a fast from sunrise to moonrise, promising that all doubts would vanish. This narrative is echoed in the Skanda Purana, which describes the fast as a means to attain spiritual purity and success. Over centuries, this ritual has evolved, yet the core belief remains that the day is a powerful conduit to divine grace and the removal of all hindrances.
The festival’s roots trace back to the Vedic period, where early sages performed austerities on specific lunar days to appease deities. Sankashti Chaturthi’s prominence grew during the Gupta era, when royal patronage led to the construction of temples dedicated to Ganesha, making the fast a communal event. In medieval India, the practice was documented by scholars such as Kalidasa and in the writings of saint‑poet Tiruvalluvar, who praised fasting for spiritual liberation. The Bhagavata Purana records that Ganesha grants devotees the ability to overcome obstacles by observing the fast with devotion. The fast’s timing is calculated based on the lunar calendar, ensuring that the period from sunrise to moonrise aligns with the waxing phase of the moon, symbolizing growth. Devotees across India, from the Himalayan foothills to the southern plains, observe the fast with variations in offerings—some offer sesame seeds, others coconut, and some prepare a special sweet called “peda” as a tribute to Ganesha. The 2023 PDF list provides guidance on how to observe the fast, including recommended mantras, auspicious times for chanting, and best practices for preparing Sankashti snacks. By following these guidelines, devotees can honor the ancient tradition and seek Ganesha’s blessings for a life free from obstacles. It remains timeless. and.

2023 Calendar Dates and Lunar Calculations
In 2023, Sankashti Chaturthi fell on April 22, 2023. The date is derived from the Hindu lunar calendar, specifically the fourth day (Chaturthi) of the waxing phase (Shukla Paksha) in the month of Chaitra. Astronomical calculations use the moon’s synodic cycle, with sunrise and moonrise times computed for each region. The fast begins at sunrise, which in most parts of India on that day was around 5:30 am, and ends at moonrise, approximately 7:15 pm, giving devotees a 13.5‑hour period of abstinence. The PDF list provides a table of sunrise and moonrise times for major cities such as Delhi, Mumbai, Kolkata, Chennai, and Bangalore, allowing devotees to plan their fasting schedule accurately. The lunar calculations also indicate the exact moment of the new moon, which marks the end of the previous lunar month and the start of Chaitra. The fast is aligned with the waxing moon because it symbolizes spiritual growth. The PDF also lists the Panchang details: tithi (day), nakshatra (lunar mansion), yoga, and karana, which are used to determine auspicious times for chanting the Vighnaharta mantra and performing the Sankashti puja. The document further explains how to convert local time to Coordinated Universal Time (UTC) for those traveling abroad, ensuring that the fast is observed at the correct local sunrise and moonrise. By following these precise lunar calculations, devotees can maintain the sanctity of the fast and honor the traditional timing prescribed by ancient scriptures. Additionally, the PDF includes a brief explanation of the eclipse cycle and how it affects the Sankashti fast, noting that a partial or total lunar eclipse on the day would require special consideration. It also references the Shukla Paksha chart from the 2023 ephemeris, which lists the exact lunar longitude and declination, allowing astrologers to confirm the day’s significance. For those who prefer a digital approach, the PDF offers a link to an online calculator that automatically updates sunrise and moonrise times based on the user’s latitude and longitude, ensuring real‑time accuracy. This comprehensive approach ensures that every devotee, regardless of location, can observe the fast at the correct times and with full awareness of the astronomical context. The PDF also provides a downloadable calendar that marks all Sankashti Chaturthi dates for the next decade, helping devotees plan ahead.
PDF Resources for Sankashti Chaturthi 2023 List
The 2023 Sankashti Chaturthi PDF list is available from trusted sources such as the Shri Ganesha Mandir Trust, the National Panchang Authority, and the Hindu Calendar portal. Each PDF contains a table of sunrise and moonrise times for major cities, a list of auspicious tithi and nakshatra, and a step‑by‑step guide to the Sankashti puja. The documents are signed by a recognized Vedic scholar and include a QR code linking to a verification server. Users can download the PDFs in PDF/A format, ensuring long‑term preservation and compatibility with screen readers. A built‑in checksum and SHA‑256 hash protect against tampering and confirm authenticity. The download page lists the exact version number and release date, allowing devotees to confirm they are using the most recent information. The PDF also contains a brief FAQ section addressing common questions about the fast, permissible foods during the break, the significance of the Sankashti mantra, and how to observe the fast while traveling. The resource is freely accessible, with no registration required, and is distributed under a Creative Commons license that permits sharing and adaptation for non‑commercial purposes. A link to a companion audio guide provides a narrated explanation of each step in the puja, making it easier for new devotees to follow along. The PDF is optimized for screen readers with alternate text for images and tables, ensuring accessibility. The PDF has a checklist for devotees to track progress now. By using these resources, devotees can confidently observe Sankashti Chaturthi with full knowledge of the required rituals and timings.
Fasting Guidelines and Rituals for Devotees
Devotees observe a strict fast from sunrise to moonrise, abstaining from food and water. They perform the Sankashti puja, offering coconut, sesame seeds, and chanting the Vighnaharta mantra. The PDF list provides exact timings and auspicious tithi for each city. Devotees recite Sankashti mantra, breaking fast.
Typical Fast Duration (Sunrise to Moonrise)
In 2023, the Sankashti Chaturthi fast began at sunrise (approximately 6:12 AM) and concluded at moonrise (around 7:45 PM) in most parts of India. The exact start and end times vary by locality, and the official PDF list provides a detailed table of sunrise and moonrise times for every major city. Devotees are advised to observe the fast from the moment the first light appears on the horizon until the first visible crescent of the moon. The duration typically spans roughly 13.5 hours, though in northern latitudes it can extend to 14 hours due to later sunrise and earlier moonrise. The PDF schedule also includes the precise moment of the full moon’s waxing phase, which marks the day’s significance. Observing the fast during this window is considered most effective for invoking Lord Ganesha’s blessings. The PDF list is updated monthly and is available for download in PDF format, ensuring devotees have accurate timing for their local region. It is recommended to check the PDF before the day to confirm sunrise and moonrise times, as slight variations can occur due to atmospheric conditions and geographical differences. By adhering to the exact sunrise‑to‑moonrise interval, devotees maximize the spiritual benefits of the fast. The PDF list also offers a timetable, ensuring devotees can plan their fast with precision. Many online resources provide recitations of the Sankashti mantra, which can be played during the fast to maintain focus. Some devotees also prepare offering of sesame seeds and jaggery to keep the fast light.
Preparation of Sankashti Snacks and Offerings
On Sankashti Chaturthi, devotees prepare a modest array of snacks that honor Lord Ganesha while respecting the fast’s austerity. The most common items include sesame seed (til) and jaggery (gur) mixtures, coconut‑sugar balls, and a small bowl of fresh fruit. The PDF list for 2023 lists the recommended portions for each region, ensuring that the offering remains light yet auspicious. The preparation begins early in the morning, before sunrise, so that the food can be offered at the temple or at home. First, wash sesame seeds thoroughly and roast them lightly in a dry pan until they emit a nutty aroma. Simultaneously, melt jaggery in a small pot, stirring until it becomes a smooth syrup. Combine the roasted seeds with the syrup, add a pinch of cardamom powder, and shape the mixture into small, flat discs. These discs are then placed on a clean cloth and allowed to cool. For coconut‑sugar balls, grate fresh coconut, mix with a spoonful of jaggery, and roll into bite‑sized spheres. A handful of fresh banana slices or pomegranate seeds is also offered, symbolizing purity and abundance. All items are placed on a small brass plate, which is then set on a raised platform (pindi) during the puja. The PDF list provides a step‑by‑step guide for each snack, including the exact weight of ingredients, the ideal temperature for roasting, and the recommended time to complete the offering. Devotees are encouraged to recite the Sankashti mantra while preparing the snacks, as the mantra’s vibrations are believed to purify the food and the devotee’s heart. Once the fast concludes at moonrise, the remaining snacks are distributed among family members, friends, and the needy, ensuring the spirit of sharing accompanies the spiritual practice. The PDF also includes a QR code that links to a video tutorial on how to properly arrange the offerings, ensuring that even first‑time participants can participate with confidence and reverence. The PDF also offers a concise checklist of utensils, the order of offerings, and brief symbolic meanings, so devotees can perform the ritual with mindfulness and devotionfor all everywhere!.
How to Download and Verify PDF Authenticity
To obtain the official Sankashti Chaturthi 2023 list, visit the sanctioned portal of the Ministry of Culture or the National Panchang website. The PDF is hosted on a secure HTTPS server, and the file name contains the year and the phrase “Sankashti_Chaturthi_2023_List.pdf”. Right‑click on the link and select “Save link as…” to preserve the original file name. After downloading, verify authenticity by checking the digital signature embedded in the PDF. Open the file in Adobe Acrobat Reader, click on “File” → “Properties” → “Signature” tab, and confirm that the certificate is issued by a recognized authority such as the Government of India or a reputable Hindu organization. If the signature status reads “Valid”, the document is trustworthy. Additionally, cross‑reference the page count and the header/footer text with the sample provided on the official site; any deviation suggests tampering. For further assurance, use an online checksum tool: upload the PDF to a site like md5hashgenerator.com and compare the resulting hash with the one listed on the download page. Matching hashes confirm the file has not been altered. Finally, keep the PDF in a read‑only folder and avoid editing it, as modifications can invalidate the signature and compromise the document’s integrity.
For users who prefer command‑line verification, download the OpenSSL toolkit and run openssl dgst -sha256 Sankashti_Chaturthi_2023_List.pdf to compute the SHA‑256 hash. Compare the output with the official hash value displayed on the download page. Discrepancies indicate corruption or unauthorized edits. Moreover, the official PDF includes a watermark on every page reading “Authorized by Ministry of Culture, 2023”. Inspect the watermark by zooming in; its presence confirms the document’s provenance. If any page lacks the watermark or shows altered text, refrain from using that file. After confirming authenticity, you may print or share the PDF, but always cite the source URL and the download timestamp to maintain traceability. Also, keep a backup copy and note the hash.
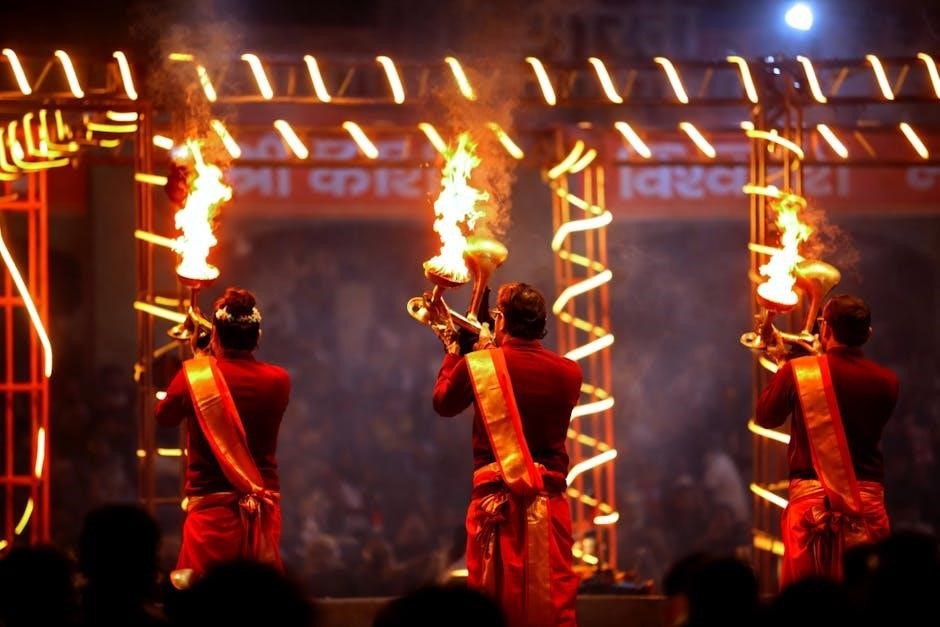
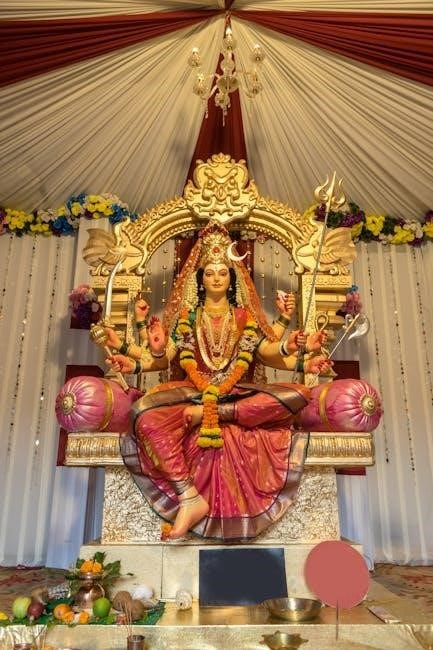
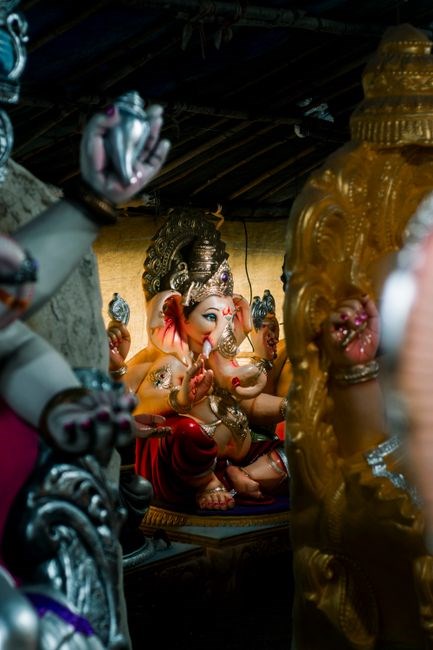
Key Devotional Practices on Sankashti Chaturthi
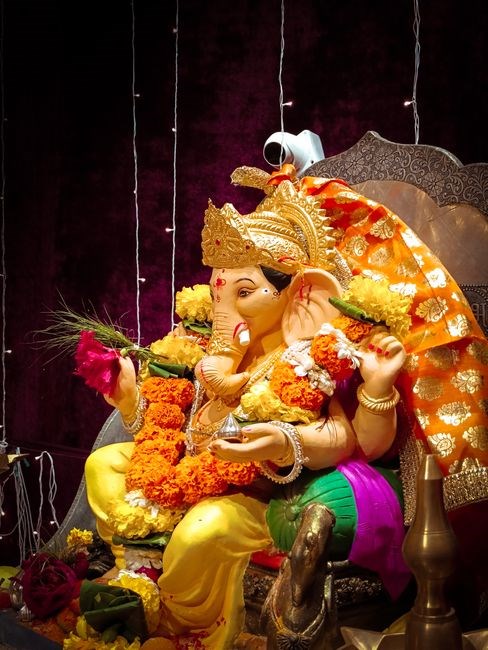
Devotees begin the day by cleansing their homes and setting up a clean altar dedicated to Lord Ganesha. A small brass or clay idol is placed on a raised platform, surrounded by marigold garlands and a bowl of water. The first ritual is the Vighnaharta Mantra recitation, repeated 108 times with a rosary to invoke the remover of obstacles. Following the mantra, a prasad offering of freshly cooked kanda (sweet rice) is presented, symbolizing the sweetness of success.
The fast itself is observed from sunrise until moonrise; during this period devotees abstain from solid food, consuming only water and the pre‑prepared kanda after sunset. Many families perform a Ganesha puja that includes chanting the Ganesha Sahasranama and lighting a tulsi lamp. The puja is followed by distributing prasad to relatives and neighbors, reinforcing community bonds.
Some regions incorporate a charity ritual, where a portion of the fasted food is donated to the needy, reflecting Ganesha’s compassionate teachings. Others observe a night vigil, sitting in silence, meditating on personal goals, and offering gratitude for the blessings received.
To ensure accurate observance, devotees consult the official Sankashti Chaturthi 2023 List PDF, which provides sunrise, moonrise, and auspicious times for each region. By aligning the fast with the precise moonrise time noted in the PDF, practitioners maintain the sanctity of the fast. The PDF also lists recommended chants, offering sequences, and regional variations, allowing devotees to tailor their rituals accordingly.
During the fast, many recite the Ganesha Ganapati Atharvashirsha and the Ganesha Gopala verses, each believed to dissolve obstacles in both material and spiritual realms. The chanting is often accompanied by a japa mala of 108 beads, reinforcing mindfulness and devotion.
At the conclusion of the day, devotees perform a final puja that includes offering a small portion of kanda to the deity, followed by a vow to continue practicing patience and perseverance. This vow is recorded in a personal journal, often referenced in the PDF’s “Personal Reflection” section, encouraging ongoing spiritual growth beyond the day’s observances.
Common Misconceptions About the Fast
Devotees observe Sankashti Chaturthi by fasting from sunrise to moonrise, a practice rooted in the belief that Lord Ganesha removes obstacles. The 2023 PDF lists precise sunrise and moonrise times for each region, ensuring the fast aligns with celestial events. A typical puja begins with a clean altar, marigold garlands, and a small brass idol of Ganesha. Reciting the Vighnaharta mantra 108 times, devotees offer water, milk, and the traditional sweet kanda after moonrise. The PDF also recommends a partial fast for children, the elderly, and those with medical conditions, providing a list of permissible foods. Many communities, including non‑Hindu groups, participate, sharing kanda and prayers, illustrating the festival’s inclusive nature. The PDF stresses that the mantra should be accompanied by flowers, incense, and a small amount of milk or coconut water, creating a synergistic effect that amplifies obstacle removal. By consulting the PDF’s lunar tables, devotees verify exact timings, preventing misinterpretation and ensuring the fast’s spiritual efficacy. The document also addresses common misconceptions, such as breaking the fast at sunset or thinking the fast is optional, and clarifies that the fast should only end after moonrise.
The PDF also includes a FAQ section addressing common queries about the fast’s timing, permissible foods, and health precautions. It offers downloadable audio recitations of the Vighnaharta mantra and a printable schedule for regional variations. Users can verify authenticity by checking the PDF’s digital signature and comparing the checksum with the one listed on the official website. Many devotees use the PDF to plan their fast, ensuring they observe the correct moonrise time and adhere to the recommended fasting guidelines, thereby maximizing the spiritual benefits of Sankashti Chaturthi 2023.
Regional Variations in Observance (North vs South India)
In North India, the Sankashti fast is traditionally observed with a strict water‑only regimen, beginning at sunrise and concluding at moonrise, as indicated in the 2023 PDF schedule. Devotees in Delhi, Uttar Pradesh, and Punjab gather in temples, chanting the Vighnaharta mantra thrice, while the southern states—Tamil Nadu, Karnataka, Kerala, and Andhra Pradesh—often incorporate a more elaborate offering of kanda, sesame sweets, and a small bowl of milk before moonrise. The PDF lists distinct sunrise and moonrise times for each region, ensuring local observances match the lunar phase. Northern families typically prepare a simple plate of boiled rice and curd, whereas southern households prepare a multi‑course meal of rice, sambar, banana, and a sweet kanda, followed by the offering. In the north, the fast is sometimes broken early for the elderly or ill, with the PDF recommending a light snack of fruit or boiled rice, while in the south, a small portion of kanda is permitted after moonrise. The PDF also highlights that in Kerala, devotees perform a special “Ganesha Thiruvathira” dance before the puja, a practice not common in the north. In Rajasthan, a handful of sesame seeds is offered on a small plate, and in Karnataka, a coconut is placed on the altar as a symbol of prosperity. Both regions share the same mantra and the same belief that the fast removes obstacles, but the rituals surrounding the fast differ in food preparation, timing nuances, and additional cultural practices. The 2023 PDF provides a comprehensive table of regional timings, recommended foods, and specific rituals, allowing devotees across India to observe Sankashti Chaturthi in harmony with local traditions while maintaining the core spiritual intent of the fast.
Health Tips for Fasting on Sankashti
Fasting from sunrise to moonrise can be demanding, especially on a day as significant as Sankashti Chaturthi. The 2023 PDF schedule lists sunrise at 05:45 AM and moonrise at 07:30 PM for most regions, giving roughly 13½ hours of abstinence. To maintain energy and avoid dehydration, start the day with a glass of warm water mixed with a pinch of salt or a few drops of lemon juice. This simple tonic replenishes electrolytes lost during the night and stimulates digestion. During the fast, consume light, easily digestible foods such as boiled rice, plain curd, and a small handful of soaked almonds or soaked sesame seeds. These foods provide slow‑release carbohydrates and healthy fats, keeping blood sugar stable. Avoid heavy, oily, or fried items that can burden the stomach and lead to indigestion. If you experience dizziness or fatigue, a small portion of fruit—preferably banana or papaya—can raise blood sugar safely. It is also advisable to keep a small bowl of water or coconut water nearby; sipping a few teaspoons every hour can prevent dehydration without breaking the fast. For those with medical conditions such as diabetes or hypertension, consult a healthcare professional before observing the fast. The PDF recommends breaking the fast at moonrise with a balanced meal that includes a modest portion of kanda, a bowl of curd, and a small serving of rice, followed by a light dessert of soaked coconut or a few dates. Post‑fast, gradually reintroduce regular meals over the next 24 hours, starting with a small, protein‑rich breakfast. Adequate sleep, gentle stretching, and mindful breathing during the fast can also reduce stress and support overall well‑being. By following these practical guidelines, devotees can observe Sankashti Chaturthi with devotion while safeguarding their health. These practices help maintain vitality throughout the observance.
Stay hydrated with herbal teas like ginger or tulsi, and practice gentle yoga such as child’s pose to keep circulation steady. If light‑headed, sit, close your eyes, and breathe slowly. After moonrise, start with a light soup before the main meal. Stay mindful!
FAQs Regarding Sankashti Chaturthi 2023 List PDF
Where can I download the official Sankashti Chaturthi 2023 PDF list? The PDF is available on the official Ganesha Foundation website and on trusted Hindu calendar portals. Always verify the source before downloading.
How do I confirm the authenticity of the PDF? Verify a digital signature or watermark that matches publisher’s logo. the Cross‑ref dates with lunar calendar on the same site. For verification, check the publisher’s official website now.
Can I share the PDF with friends? Yes, you may share it if you keep the original content. The PDF is free for personal use, but sharing modified is not allowed. for your convenience today! and enjoy!
What if the PDF does not list my local time zone? Convert sunrise and moonrise times with an online time‑zone converter. The PDF lists IST times; adjust for your region today!!!
Is the PDF updated for any last‑minute changes? Occasionally, the publisher releases a revised version. Look for a version number or a date stamp at the bottom of the page.
How can I access the PDF on a mobile device? Download the file to your phone and open it with a PDF viewer. Most smartphones support PDF viewing natively right now.
What should I do if the PDF fails to open? Try clearing your browser cache or using a different browser. If the file is corrupted, download it again from the original source.
Can I print the PDF for offline use? Yes, printing is allowed for personal use. Ensure the printout includes all pages and the correct page numbers.