The Millermatic 211 is a versatile, user-friendly welder, ideal for both beginners and experienced professionals. It consistently delivers high-quality welds across various projects.
Overview of the Millermatic 211 Welder
The Millermatic 211 is a highly-regarded, portable MIG welder known for its reliability and ease of use. It operates on standard 120V power, making it suitable for home workshops and job sites. This machine excels in welding steel, stainless steel, and aluminum (with a spool gun). Its intuitive controls and Auto-Set feature simplify setup for various materials and thicknesses, ensuring consistent results. The Millermatic 211 is a robust choice for auto repair, home fabrication, and light industrial applications.
Target Audience and Welding Applications
The Millermatic 211 caters to a broad range of users, from DIY enthusiasts to professional welders. It’s perfect for beginners due to its user-friendly interface and Auto-Set modes. Common applications include automotive repair, home projects like furniture building, and light fabrication. Experienced welders appreciate its control and versatility for more complex tasks. The welder handles materials like mild steel, stainless steel, and aluminum (with optional spool gun), making it a truly adaptable machine.
Setting Up Your Millermatic 211
Proper setup ensures optimal performance and safety. This involves a thorough inspection of all components, secure gas and power connections, and correct wire installation.
Initial Inspection and Component Check
Before first use, carefully inspect the Millermatic 211 for any shipping damage. Verify all components are present, including the power cable, gas hose, ground clamp, electrode holder, and welding wire spool. Check the welding gun cable for kinks or breaks. Ensure the machine is clean and free of debris. Confirm the polarity selector is in the correct position for your intended welding process. A pre-use check guarantees safe and efficient operation, preventing potential issues during welding.
Gas and Power Supply Connection
Connect the appropriate shielding gas – typically argon/CO2 mix for MIG welding – using a regulator and hose. Ensure a secure connection to prevent leaks. Verify the power supply voltage matches the welder’s requirements (120V or 240V). Use the correct plug and circuit breaker. Never use extension cords unless absolutely necessary, and if so, use a heavy-duty one. Proper connections are crucial for stable arc and weld quality, safeguarding both the welder and the operator.
Wire Installation and Tension Adjustment
Install the correct diameter welding wire, following the spooling direction indicated on the machine. Secure the spool firmly to prevent unraveling during welding. Adjust the wire tension knob; too loose causes bird nesting, while too tight hinders feeding. Proper tension ensures a smooth, consistent wire feed, vital for stable arc length and quality welds. Regularly check and readjust tension as the spool empties.

Understanding the Millermatic 211 Controls
The Millermatic 211 features intuitive controls for voltage, wire feed speed, and mode selection, allowing precise adjustments for optimal welding performance.
Voltage and Wire Feed Speed Settings
Voltage controls the arc’s energy, influencing weld penetration and bead profile; higher voltage means deeper penetration. Wire feed speed dictates the metal deposition rate, affecting weld size and travel speed.
These settings are interconnected; increasing one often requires adjusting the other. The Millermatic 211’s charts provide recommended settings based on material thickness and type. Experimentation is key to achieving desired results, considering factors like joint design and welding position. Precise control ensures strong, clean welds.
Mode Selection (MIG, Flux-Cored, Stick)
The Millermatic 211 offers versatility with MIG, Flux-Cored, and Stick welding modes. MIG (Gas Metal Arc Welding) is ideal for clean, precise welds on thinner materials, utilizing shielding gas. Flux-Cored provides portability, suitable for outdoor projects, as it doesn’t require external gas.
Stick (SMAW) excels in challenging conditions and thicker materials. Selecting the correct mode depends on the application, material type, and desired weld quality. Proper setup for each mode is crucial for optimal performance.
Burn Back Control and its Importance
Burn back refers to the wire continuing to feed into the weld pool after the arc stops. The Millermatic 211’s burn back control adjusts how long the wire continues feeding, preventing sticking and ensuring smooth arc restarts.
Proper burn back settings minimize waste, reduce spatter, and improve weld quality. Incorrect settings can lead to wire sticking, inconsistent welds, and potential machine issues. Adjusting this setting is vital for optimal performance.
MIG Welding Techniques with the Millermatic 211
Mastering MIG welding with the Millermatic 211 requires selecting the correct wire, gas, and parameters for optimal results and strong, clean welds.
Choosing the Right Welding Wire
Selecting the appropriate welding wire is crucial for successful MIG welding with the Millermatic 211. Common choices include ER70S-6 for general steel applications, offering excellent weldability and strength. For thicker materials, consider E71T-1 wires. Stainless steel requires specific stainless steel wires like ER308L or ER309L.
Wire diameter impacts penetration and deposition rate; .030″ is versatile, while .035″ and .045″ are suited for heavier gauges. Always consult the Millermatic 211 manual for recommended wire types and settings based on your project’s material and thickness.
Shielding Gas Selection and Flow Rate
Proper shielding gas is vital for protecting the weld pool from atmospheric contamination when using the Millermatic 211. Argon/CO2 mixes (75/25 or 90/10) are common for steel, offering good arc stability and weld quality. Straight CO2 is cost-effective but can cause more spatter.
Gas flow rate typically ranges from 20-25 cubic feet per hour (CFH). Adjust based on material thickness and welding environment; drafts require higher flow. Refer to the Millermatic 211 manual for specific gas recommendations and flow rate adjustments.
Welding Steel: Parameters and Best Practices
For welding steel with the Millermatic 211, start with settings based on material thickness. Mild steel typically uses .030″ or .035″ wire with 18-22 volts and 150-200 amps.
Employ a travel speed that creates a consistent bead profile. Use a slight push angle and maintain a short arc length. The Millermatic 211 manual provides detailed charts for specific steel types and thicknesses, ensuring optimal weld penetration and strength.

Troubleshooting Common Issues
Addressing problems promptly ensures optimal performance. The Millermatic 211 manual details solutions for wire feed issues, arc instability, and burn back occurrences.
Wire Feeding Problems and Solutions
Consistent wire feed is crucial for quality welds. If the wire spools aren’t properly installed or the tension is incorrect, feeding can become erratic. Check the drive roll pressure; too loose causes slipping, while too tight deforms the wire.
Ensure the liner isn’t clogged or damaged, hindering smooth passage. A worn drive roll also contributes to issues. Refer to the Millermatic 211 manual for detailed diagrams and troubleshooting steps to resolve these common wire feeding challenges effectively.
Arc Instability and How to Fix It
An unstable arc results in inconsistent welds and potential defects. Common causes include improper grounding, insufficient gas coverage, or a dirty workpiece. Verify a solid ground connection and adequate shielding gas flow.
Contamination on the metal surface disrupts the arc; thoroughly clean it before welding. Adjusting voltage and wire feed speed can also stabilize the arc. Consult the Millermatic 211 manual for specific troubleshooting guidance and recommended settings for optimal arc performance.
Burn Back and Troubleshooting Steps
Burn back occurs when the weld wire melts back into the contact tip, halting the welding process. This often stems from excessive voltage, insufficient wire feed speed, or a build-up of spatter. Reduce voltage incrementally and increase wire feed speed to counteract burn back.
Inspect and clean the contact tip regularly. Refer to the Millermatic 211 manual for precise settings and troubleshooting charts. Adjusting burn-back control can also minimize this issue, ensuring smooth and consistent welding.
Maintenance and Care
Regular cleaning and timely replacement of consumable parts are crucial for optimal Millermatic 211 performance and longevity. Follow the manual’s schedule diligently.
Regular Cleaning Procedures
To maintain peak performance, routinely clean your Millermatic 211. After each use, remove the nozzle and contact tip, wire spool, and thoroughly brush away any spatter or residue. Inspect the drive rolls for buildup and clean as needed. Periodically, use compressed air to blow out the internal components, focusing on the wire path and gas diffuser. A clean welder ensures smooth wire feeding and consistent arc quality, extending the lifespan of critical parts and preventing operational issues.
Consumable Parts Replacement Schedule
Regularly replacing consumable parts is crucial for optimal welding. Contact tips should be replaced every few hours of use, or when showing signs of wear. Nozzles require replacement when spatter buildup hinders gas flow. Drive rolls should be inspected monthly and replaced when grooved. Wire liners benefit from replacement every 50-100 pounds of wire used. Following this schedule ensures consistent weld quality, prevents wire feeding issues, and maximizes the Millermatic 211’s efficiency.
Storage Recommendations for the Millermatic 211
Proper storage extends the lifespan of your Millermatic 211. Store it in a clean, dry environment, protected from dust and moisture. Cover the welder to prevent contamination. Disconnect the gas cylinder and store it separately in a well-ventilated area. Secure all cables and hoses to avoid damage. Regularly check for corrosion and address it promptly to maintain optimal performance and longevity.
Safety Precautions
Always wear appropriate PPE, including a welding helmet, gloves, and fire-resistant clothing. Ensure proper ventilation and adhere to electrical safety guidelines during operation.
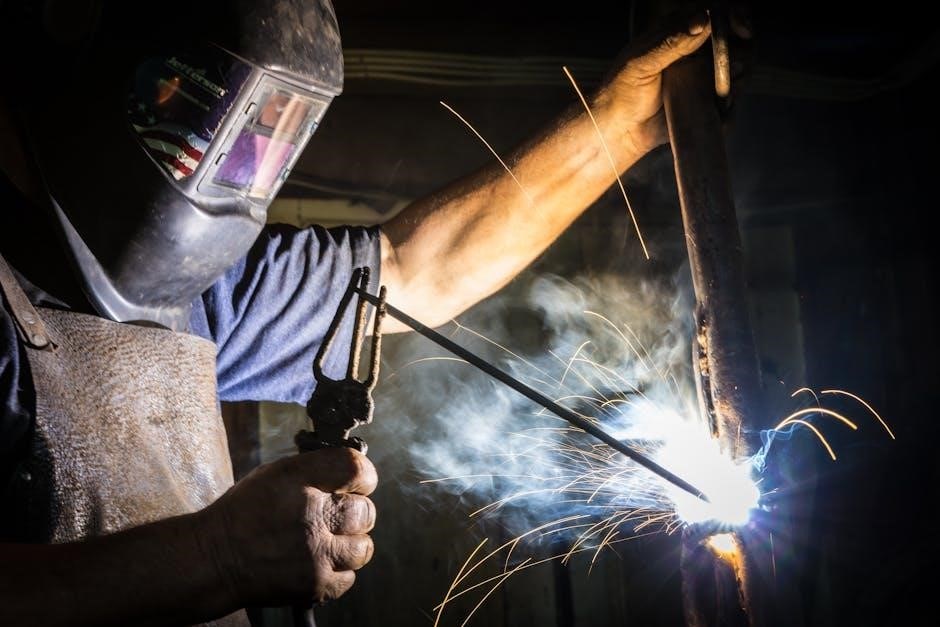
Personal Protective Equipment (PPE)
Prioritizing safety demands proper PPE. A welding helmet with the correct shade protects your eyes from intense UV radiation and sparks. Wear flame-resistant gloves to shield hands from heat and burns. Long sleeves and pants, preferably made of leather or treated cotton, minimize skin exposure.
Sturdy, closed-toe shoes are essential, and safety glasses underneath the helmet offer an extra layer of protection. A respirator is crucial when welding materials that produce harmful fumes, ensuring clean air intake. Always inspect PPE for damage before each use.
Electrical Safety Guidelines
Working with electricity requires strict adherence to safety protocols. Always ensure the Millermatic 211 is properly grounded to prevent electric shock. Inspect power cords for damage before each use, replacing any frayed or cracked cables immediately.
Never weld in damp or wet environments, as water significantly increases electrical hazards. Disconnect the power supply before performing any maintenance or repairs. Avoid touching live electrical parts. Use insulated tools and wear appropriate safety footwear.
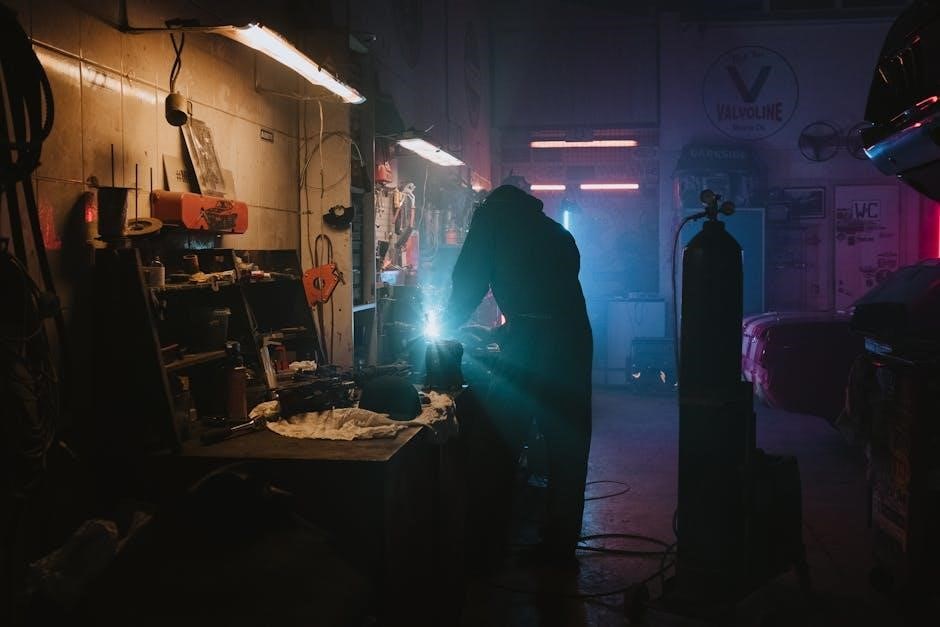
Ventilation and Fume Control
Welding produces fumes that can be hazardous to your health. Adequate ventilation is crucial when operating the Millermatic 211. Work in a well-ventilated area, or use a fume extractor to remove airborne contaminants.
Position yourself and the welder to avoid breathing fumes directly. Always wear a respirator approved for welding fumes. Be mindful of surrounding materials, as welding fumes can ignite flammable substances. Prioritize a safe and healthy working environment.
Advanced Techniques
Explore pulse welding for greater control and aluminum welding with a spool gun. Flux-cored welding expands capabilities for thicker materials and outdoor use.
Pulse Welding with the Millermatic 211
Pulse welding on the Millermatic 211 offers precise heat control, minimizing distortion and creating aesthetically pleasing welds. This technique alternates between high and low current, allowing for focused penetration and reduced spatter. Adjust pulse frequency and duty cycle to tailor the weld to specific materials and thicknesses. It’s particularly beneficial for thin metals and root passes, improving weld quality and reducing the risk of burn-through. Experiment with settings to master this advanced method for superior results.
Welding Aluminum with Spool Gun Attachment
Welding aluminum with the Millermatic 211 requires a spool gun due to aluminum’s softness and tendency to bird-nest on standard liners. The spool gun feeds the wire directly from a small spool, minimizing feeding issues. Use an argon shielding gas and appropriate aluminum welding wire. Proper setup and technique are crucial for clean, strong aluminum welds. Adjust voltage and wire feed speed carefully, and practice on scrap material first for optimal results.
Flux-Cored Welding Applications
The Millermatic 211 excels in flux-cored welding, ideal for thicker materials and outdoor projects where shielding gas isn’t practical. Utilize E71T-1 or similar flux-cored wire. This process creates its own shielding, making it wind-resistant. Adjust polarity to DCEN (electrode negative). Expect more spatter than MIG welding; proper technique minimizes this. Flux-cored welding delivers high deposition rates, increasing welding speed and efficiency on robust applications.
Millermatic 211 vs. Competitors
Compared to competitors, the Millermatic 211 offers a balance of affordability, portability, and performance, making it a strong choice for diverse welding needs.
Comparison with Other Popular MIG Welders
When stacked against other popular MIG welders like the Hobart 219 or Lincoln PowerMIG 215, the Millermatic 211 distinguishes itself with its smooth arc control and intuitive interface. While some competitors may offer slightly higher amperage outputs, the 211 excels in ease of use, particularly for beginners. It often provides a more refined welding experience for thinner materials, and its portability is a significant advantage. However, heavier-duty applications might favor the capabilities of the Lincoln or Hobart models.
Advantages and Disadvantages of the Millermatic 211
The Millermatic 211 boasts several advantages, including its user-friendliness, portability, and excellent arc stability, making it ideal for home and small shop use. However, it may lack the sheer power needed for extremely thick materials or heavy-duty industrial applications. Some users note the spool gun attachment is an added expense for aluminum welding, and the price point is higher than some entry-level alternatives.
Resources and Support
Miller Welding provides extensive online documentation, helpful forums, and a robust network of authorized service centers for the Millermatic 211.
Miller Welding Website and Documentation
The official Miller Welding website (millerwelds.com) is the primary hub for all Millermatic 211 resources. Here, you’ll find downloadable manuals in PDF format, detailed spec sheets, frequently asked questions, and troubleshooting guides. Miller also offers a wealth of instructional videos demonstrating proper setup, welding techniques, and maintenance procedures. Access to warranty information and registration is readily available, ensuring your investment is protected. Furthermore, the site features a parts lookup tool to easily identify and order replacement components when needed.
Online Forums and Communities
Numerous online welding forums and communities provide invaluable support for Millermatic 211 users. Websites like WeldingWeb and MillerWelds’ dedicated forum section host discussions, troubleshooting advice, and shared experiences. These platforms allow you to connect with fellow welders, ask specific questions about your machine, and learn from others’ successes and challenges. Many experienced users readily share tips, tricks, and modifications, enhancing your welding journey and understanding of the Millermatic 211.
Warranty Information and Service Centers
The Millermatic 211 typically comes with a standard manufacturer’s warranty, covering defects in materials and workmanship. It’s crucial to register your welder promptly to activate this coverage. Miller offers a network of authorized service centers across the country, providing repair, maintenance, and parts replacement. Contacting Miller directly or visiting their website will provide specific warranty details and locate the nearest authorized service provider for efficient support and repairs.