
Panasonic bread makers offer convenience and consistent results, simplifying homemade bread creation․ Models like the SD-RBM1001 and SD-BT10P deliver fresh loaves effortlessly, appealing to both novice and experienced bakers․
What is a Panasonic Bread Maker?
A Panasonic bread maker is an automated appliance designed to simplify the process of baking bread at home․ Unlike traditional methods requiring kneading and precise temperature control, these machines handle the entire process – mixing ingredients, kneading dough, proofing, and baking – with minimal user intervention․
Popular models, such as the SD-MDX100-W and SD-RD250, feature pre-programmed settings for various bread types, including white, whole wheat, and even gluten-free options․ They offer a convenient way to enjoy freshly baked bread without extensive baking expertise․
Benefits of Using a Panasonic Bread Maker
Panasonic bread makers provide numerous advantages, starting with the delightful aroma of freshly baked bread filling your home․ They offer convenience, saving time and effort compared to traditional baking methods․ Users enjoy control over ingredients, avoiding preservatives found in store-bought bread․
Furthermore, these machines cater to dietary needs, enabling gluten-free or whole wheat baking․ Models like the SD-BMT1001 and SD-P104 offer consistent results, making homemade bread accessible to all skill levels․

Understanding Your Panasonic Bread Maker Model
Panasonic offers diverse models – SD-RBM1001, SD-MDX100-W, SD-RD250, and more – each with unique features․ Familiarizing yourself with your specific model is crucial for optimal use․
Identifying Your Specific Model (SD-RBM1001, SD-MDX100-W, SD-RD250, SD-BMT1001, SD-BT10P, SD-P104)
Locating your model number is the first step․ It’s typically found on a sticker underneath the bread maker, or within the lid compartment․ Panasonic offers several variations, including the SD-RBM1001, SD-MDX100-W, SD-RD250, SD-BMT1001, SD-BT10P, and the SD-P104 (HK version)․ Knowing your exact model unlocks access to the correct user manual and specific recipe guidance, ensuring successful baking and maximizing your machine’s capabilities․
Key Components and Their Functions
Essential parts include the baking pan, kneading blade, and heating element․ The pan securely holds ingredients, while the blade mixes and kneads dough․ The heating element ensures even baking․ Control panels manage settings like crust color and loaf size․ Ingredient dispensers (on some models) automatically add fruits or nuts․ Understanding each component’s role is crucial for optimal performance and delicious results․

Getting Started: First Use & Preparation
Before the first bake, thoroughly clean the pan and kneading blade․ Run a practice cycle without ingredients to eliminate any manufacturing residue and prepare the machine․
Initial Setup and Cleaning
Unpack your Panasonic bread maker and remove all packaging materials․ Before the initial use, wipe down the exterior with a damp cloth․ Crucially, wash the baking pan and kneading blade with warm, soapy water; ensure they are completely dry before re-inserting․ Run an empty cycle—without any ingredients—to burn off any residual manufacturing odors and prepare the machine for baking; This initial cleaning process guarantees a fresh start and optimal performance for your first loaf․
Essential Ingredients and Their Roles
Flour provides structure, with bread flour offering higher protein for gluten development․ Yeast is the leavening agent, creating air bubbles for a light texture․ Water hydrates the flour and activates the yeast․ Sugar feeds the yeast and adds sweetness; Salt controls yeast activity and enhances flavor․ Fat, like oil or butter, contributes to softness and richness, impacting the final bread quality․

Using Basic Bread Recipes
Panasonic bread makers excel at simple recipes․ Start with white or whole wheat bread, utilizing pre-programmed settings for consistent, delicious results with minimal effort․
Basic White Bread Recipe
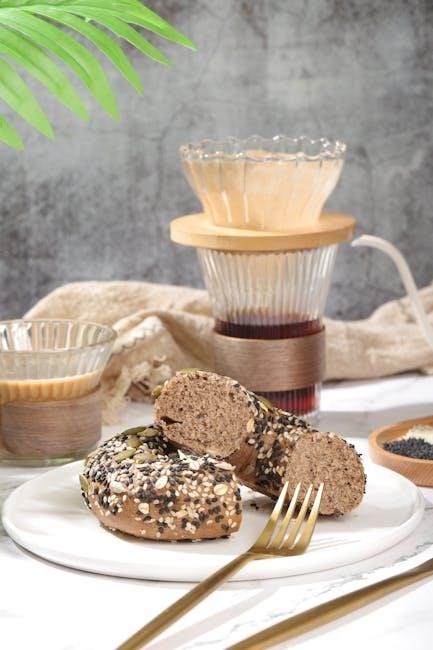
For a classic loaf, combine 280ml water, 450g bread flour, 1 tsp salt, 1 tbsp sugar, and 2 tsp instant dry yeast in your Panasonic bread maker pan․ Select the ‘Basic’ or ‘White Bread’ program, choosing your desired crust color and loaf size․ Ensure ingredients are added in the order recommended by your model’s manual for optimal results․ This simple recipe consistently produces a soft, flavorful loaf perfect for sandwiches or toast, showcasing the machine’s ease of use․
Whole Wheat Bread Recipe
To bake a nutritious loaf, use 250ml water, 300g whole wheat flour, 150g bread flour, 1 tsp salt, 1 tbsp honey, and 2 tsp instant dry yeast in your Panasonic machine․ Select the ‘Whole Wheat’ program, adjusting crust and size as preferred․ Whole wheat requires more liquid; monitor dough consistency․ This recipe yields a hearty, flavorful bread, ideal for health-conscious individuals, demonstrating the bread maker’s versatility beyond white bread․

Advanced Bread Making Techniques
Explore creativity! Add fruits, nuts, or seeds during the ingredient-add cycle for customized flavors․ Experiment with gluten-free flours for dietary needs and preferences․
Adding Fruits, Nuts, and Seeds
Enhance your loaves with delightful additions! Utilize the dispenser function on your Panasonic bread maker to automatically add fruits, nuts, or seeds during the kneading cycle․ This ensures even distribution without interrupting the process․ Dried fruits work exceptionally well, while nuts and seeds benefit from a light toasting beforehand to maximize flavor․ Consider quantities carefully – approximately 1/2 to 1 cup of additions per standard loaf is ideal, preventing disruption to the dough’s rise and texture․ Experiment with combinations like cranberries and walnuts, or sunflower seeds and raisins!
Creating Gluten-Free Bread
Panasonic bread makers can produce delicious gluten-free loaves with the right approach․ Select the dedicated gluten-free program if available, or utilize a standard program with adjustments․ Gluten-free flour blends require xanthan gum for structure; follow recipe guidelines carefully․ Due to the lack of gluten, gluten-free doughs often need a longer rise time and may benefit from a slightly wetter consistency․ Monitor closely, as baking times can vary․
Customizing Your Bread Settings
Panasonic bread makers allow adjustments for personal preferences․ Control crust color—light, medium, or dark—and select loaf size to suit your needs and recipe requirements․
Crust Color Control
Panasonic bread makers feature adjustable crust settings, typically offering light, medium, and dark options․ Selecting a darker setting extends baking time, resulting in a richer, more robust crust․ Conversely, a lighter setting produces a softer, paler crust․ Experimenting with these settings allows you to achieve your desired level of crispness and color, tailoring each loaf to your specific taste preferences․ Consider the recipe and your personal enjoyment when choosing a crust color․
Loaf Size Selection
Panasonic bread makers often provide options for baking different loaf sizes, commonly 1․5lb and 2lb․ Selecting the appropriate size ensures optimal baking results and prevents issues like underbaked centers or overly dense textures․ Smaller loaves bake faster, while larger loaves require extended baking times․ Always refer to your recipe for the recommended loaf size to guarantee a perfectly baked and satisfying bread experience․
Troubleshooting Common Issues
Addressing problems like uneven baking or dough not rising is crucial for success․ Common issues often stem from ingredient inaccuracies or incorrect settings within the machine․
Bread Not Rising Properly
If your dough isn’t rising, ensure the yeast is fresh and properly activated – check the expiration date! Verify accurate ingredient measurements, especially yeast and liquids, as imbalances significantly impact rise․ Ambient temperature matters; a cold kitchen can hinder yeast activity․
Also, confirm the correct program is selected, and the kneading cycle isn’t interrupted․ Overmixing or using old flour can also contribute to this issue, affecting gluten development․ Finally, ensure the heating element functions correctly․
Burning or Uneven Baking
Uneven or burnt bread often indicates issues with ingredient distribution or the heating element․ Ensure ingredients are added in the correct order, and the pan is properly seated․ Check the crust color setting; a darker setting increases burning risk․
Excess sugar or fat can accelerate browning․ If the issue persists, inspect the heating element for inconsistencies and consider a different baking program․ Avoid opening the lid during baking․

Cleaning and Maintenance
Regular cleaning extends your Panasonic bread maker’s life․ Daily wipe the exterior, and thoroughly wash the pan and kneading blade after each use for optimal performance․
Daily Cleaning Procedures
After each baking cycle, promptly unplug your Panasonic bread maker and allow it to cool completely․ Carefully remove the baking pan and kneading blade․ Wash these components with warm, soapy water, ensuring all dough residue is eliminated․ Avoid abrasive cleaners that could damage the non-stick coating․ Wipe the machine’s exterior with a damp cloth․ Thorough drying of all parts before reassembly prevents mold and ensures longevity․
Long-Term Maintenance Tips
To preserve your Panasonic bread maker’s performance, periodically inspect the heating element for any debris․ Clean the sensor inside the bread maker regularly․ Avoid harsh chemicals; mild detergent is best․ Store the machine in a cool, dry place when not in use․ Check the power cord for damage and replace if necessary․ Proper care extends the lifespan of your appliance․
Recipe Ideas Beyond Basic Bread
Explore diverse recipes! From pizza dough and sweet breads to delightful desserts, Panasonic bread makers offer versatility beyond simple loaves, expanding culinary possibilities․
Pizza Dough Recipe
Creating pizza dough in your Panasonic bread maker is surprisingly simple! Utilize the dough setting, adding 1 ¼ cups warm water, 3 ½ cups bread flour, 2 tablespoons olive oil, 1 teaspoon salt, and 2 ¼ teaspoons active dry yeast․ Select the dough cycle, and once complete, knead briefly before shaping your perfect pizza․ This method delivers a consistently excellent base for homemade pizzas, saving time and effort compared to traditional methods, offering a delightful culinary experience․
Sweet Bread and Dessert Recipes
Beyond basic loaves, your Panasonic bread maker excels at sweet treats! Explore cinnamon swirl bread using the sweet bread cycle, adding sugar, cinnamon, and a cream cheese swirl․ For dessert, try a chocolate cake recipe, utilizing the cake setting with cocoa powder and chocolate chips․ These options demonstrate the machine’s versatility, delivering delicious, homemade desserts with minimal effort, expanding your baking possibilities beyond traditional bread․

Safety Precautions
Always unplug the bread maker before cleaning․ Avoid touching hot surfaces and ensure proper electrical grounding․ Never immerse the appliance in water for safety․
Electrical Safety
To prevent electrical shock, never operate the Panasonic bread maker with a damaged cord or plug․ Ensure the voltage of your outlet matches the appliance’s specifications․ Avoid using extension cords if possible; if necessary, use a heavy-duty cord rated for the appliance’s wattage․ Do not operate the bread maker near water or in damp environments․ Always unplug the appliance when not in use and before cleaning․ Never attempt to repair the appliance yourself – contact qualified service personnel for assistance․
Operating Safety
Always ensure the bread pan is securely locked into place before starting the Panasonic bread maker․ Avoid touching hot surfaces, like the bread pan or heating element, during or immediately after operation․ Never open the lid during the baking cycle unless absolutely necessary, using oven mitts for protection․ Do not overfill the bread pan with ingredients, and supervise children when the appliance is in use․ Allow the unit to cool completely before storing․
Understanding Error Codes
Panasonic bread makers display error codes to indicate issues․ Decoding these messages—like those found in the SD-P104 manual—helps resolve problems quickly and efficiently․
Decoding Common Error Messages
Panasonic bread makers utilize error codes for diagnostics․ “H1” or “H2” often signal a temperature sensor malfunction, requiring service․ “E0” indicates a problem with the heating element, while “E1” suggests a motor issue․ Referencing your model’s manual (like the SD-P104) is crucial․ Understanding these codes—and potential solutions—prevents wasted ingredients and ensures successful baking․ Ignoring persistent errors may necessitate professional repair to maintain optimal performance and safety․
Resolving Error Code Issues
Addressing Panasonic bread maker errors starts with power cycling the unit․ For “E1” (motor error), ensure the kneading paddle is correctly installed․ “H1/H2” (temperature) often requires professional repair․ Check the power cord and outlet for “E0” (heating); Consult your model’s manual—SD-BT10P or SD-RD250—for specific guidance․ If issues persist, contact Panasonic support or a qualified appliance technician for assistance and avoid further damage․

Where to Find More Recipes and Support
Panasonic’s official website provides recipes and FAQs․ Online bread-making communities offer diverse recipes and troubleshooting tips for models like the SD-P104 and others․
Panasonic Official Website Resources
Panasonic’s official website is the primary source for comprehensive support regarding your bread maker․ You’ll discover downloadable user manuals for specific models – including the SD-RBM1001, SD-MDX100-W, and SD-BT10P – offering detailed instructions and safety guidelines․ Furthermore, explore a curated collection of bread recipes, ranging from basic white bread to more adventurous creations․ The site also features a frequently asked questions (FAQ) section addressing common issues and troubleshooting steps, ensuring a smooth baking experience․ Direct access to parts and accessories is also available․
Online Bread Making Communities
Numerous online forums and communities dedicated to bread making provide a valuable platform for Panasonic bread maker users․ These spaces allow you to exchange recipes, troubleshoot issues, and share tips with fellow enthusiasts․ Websites and social media groups often feature model-specific discussions, offering tailored advice for models like the SD-RD250 or SD-P104․ Benefit from collective knowledge, discover innovative techniques, and find inspiration for your next baking project within these supportive online networks․